

This Costco pumpkin pie recipe glow-up feeds a crowd just like the original, but with a buttery crust that actually holds together and a filling so smooth and silky, you'll never go back to store-bought. Everyone raves about the Costco pumpkin pie, and for $6, I can see why.
It's about 12 inches across, roughly the size of a pizza, so it goes a long way at a holiday table. I picked one up to see if I could do better, and after one taste test, I knew I could.
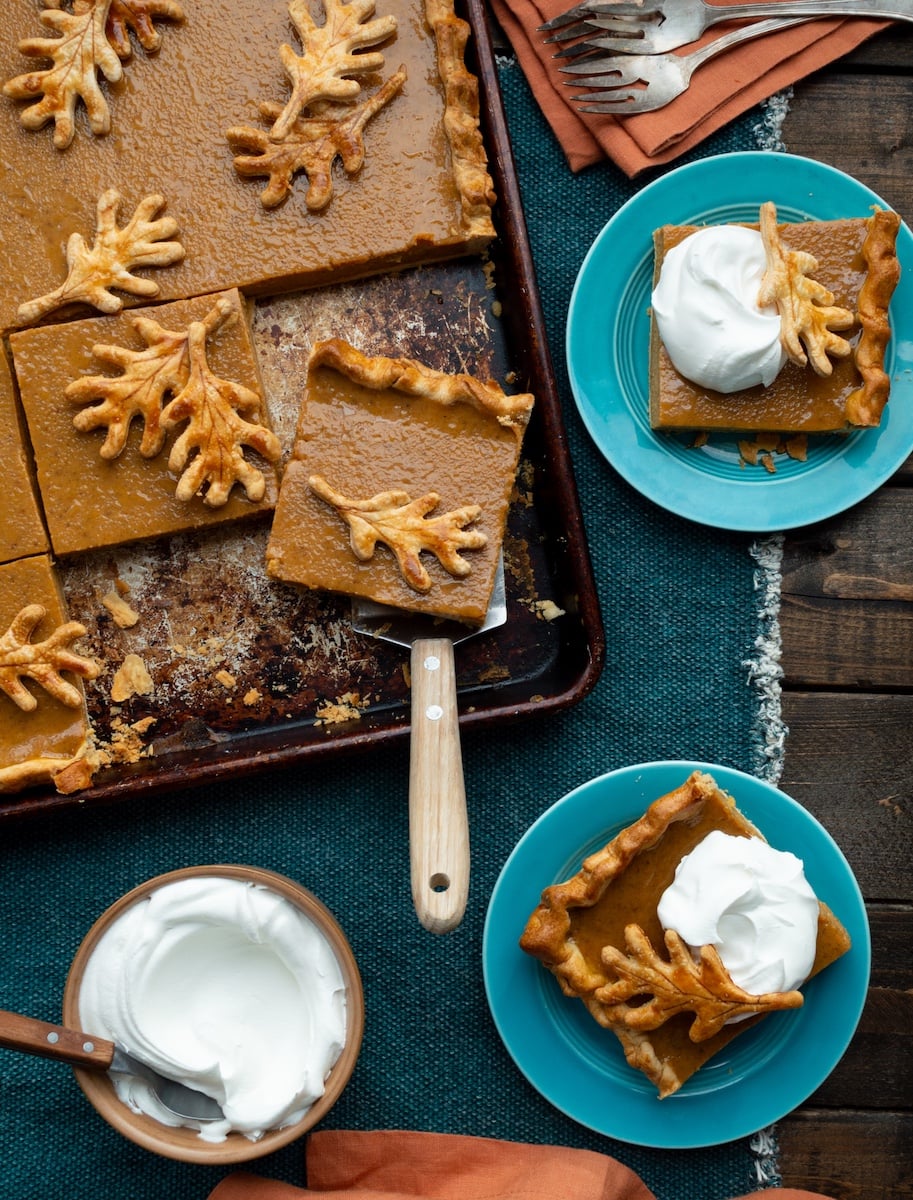
For starters, Costco's pumpkin pie crust needed some help. It was on the soggy side and super crumbly, and when I cut out a slice, it fell apart into a million pieces. Yes, $6 is a bargain, but my version is so much better. You don't need a special pan, and there's one secret ingredient that gives the filling the creamy texture we all aim for.
Instead of buying a giant specialty pie pan that would hog precious cabinet space the rest of the year, I went the slab pie route. It bakes on a rimmed baking sheet, which I'm betting you already have in your cabinet. You can still feed a crowd, maybe even more people than the Costco pie, with 15 to 18 servings.
Store-Bought vs. Homemade Pie Crust Dough
You've got two options for the crust here, and both work beautifully. If you want to keep things easy, store-bought pie crust is great. I bought two boxes from Aldi (each comes with two crusts) and smooshed the circles together into one big sheet. I probably could've gotten away with three crusts, but I wanted plenty left over for fluted edges and cute little leaves for the top.
If you want to go full-on homemade, a double batch of my homemade buttery flaky crust recipe takes this pie from great to absolutely amazing. It's everything you want about from-scratch crust and holds together when you slice it, which is exactly what the Costco pie was missing. Bonus: it's easier on the budget, and you won't have to worry about piecing the round crusts together.
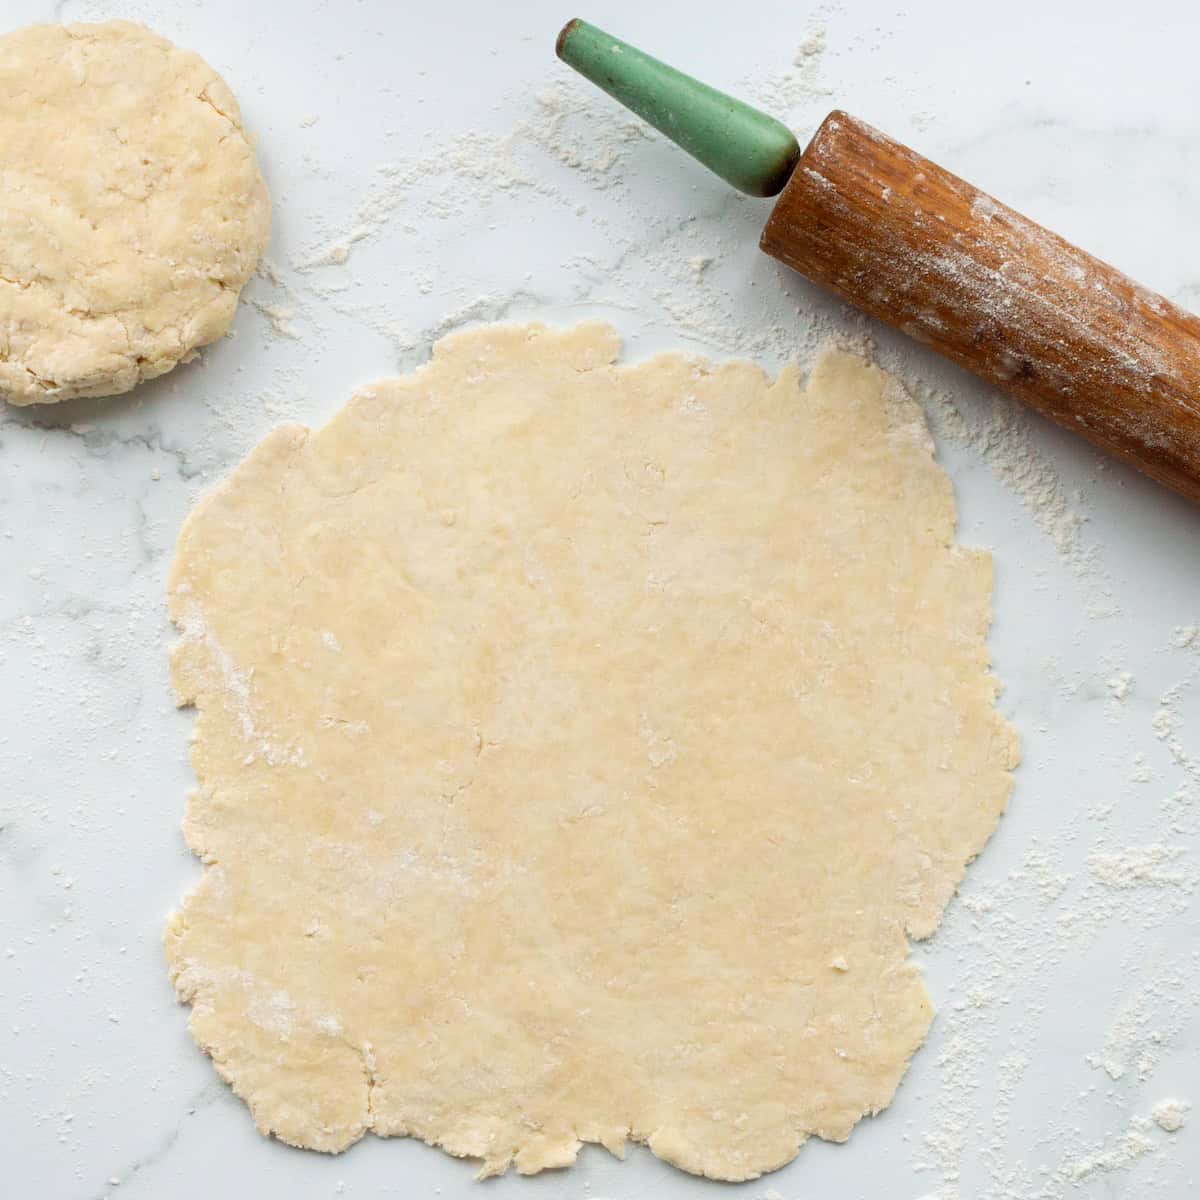
Whichever dough route you choose, don't skip the blind bake step. Pumpkin pie is a custard pie, so giving the crust a head start in the oven is your best defense against a soggy bottom.
What Makes This Pumpkin Filling So Creamy and Delicious
The secret ingredient in this pie is sweetened condensed milk. It gives the filling the ultimate smooth, silky texture. With other pumpkin pie recipes I've made in the past, the filling sometimes turned out grainy and way too wet (I bet that was the culprit behind the Costco pie's soggy crust).
A smidge of dark brown sugar and a splash of vanilla extract add deep richness without making it overly sweet, and a little extra cinnamon and clove stirred into the pumpkin pie spice brings out all those warm spices and flavors we love in the first place.
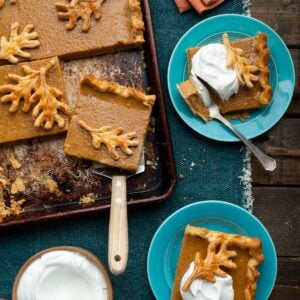
Finish it off with those cute pie crust leaves and a big dollop of whipped cream on each slice. It's a pretty little touch that makes this pie look just as good as it tastes.
Reasons to Love this Recipe
- Feeds a crowd: This slab pie makes 15 to 18 servings, even more than the Costco pie, and it bakes on a rimmed baking sheet you probably already have.
- Easy to slice and serve: No more pie wedges falling apart on the way to the plate. Cut the squares as big or as small as you like depending on how many people you're feeding.
- A crust that holds its own: Say goodbye to soggy, crumbly crust. Store-bought crust keeps things easy, or go the homemade pie crust route with my all-butter piecrust for the very best version.
- Silky smooth filling: Sweetened condensed milk gives you a creamy custard filling every time, with none of that grainy, watery texture.
- Warm, cozy flavor: Dark brown sugar, vanilla, and an extra boost of cinnamon and clove make it taste like Thanksgiving in every bite.
- Pretty without the fuss: Scatter little pie crust leaves over the top and add a dollop of whipped cream, and it's ready for the dessert table.
While we're at it, if you're still in the mood for fall baking, I've got a few pumpkin recipes I come back to every year. This copycat Krusteaz pumpkin bread is perfect with a cup of coffee, and when I'm making breakfast, these pumpkin buttermilk pancakes are always an easy win.
For something a little more fun, try these pumpkin Rice Krispie treats. They're not pumpkin-flavored, but they are pumpkin shaped and always a hit. And when I want something cozy and extra special, these pumpkin cinnamon rolls with maple cream cheese frosting are my favorite fall treat for lazy weekend mornings.
Ready to get to that pie? Let's do it!
Jump to:
Ingredients
Before we get started, let's gather the ingredients we need for this recipe:
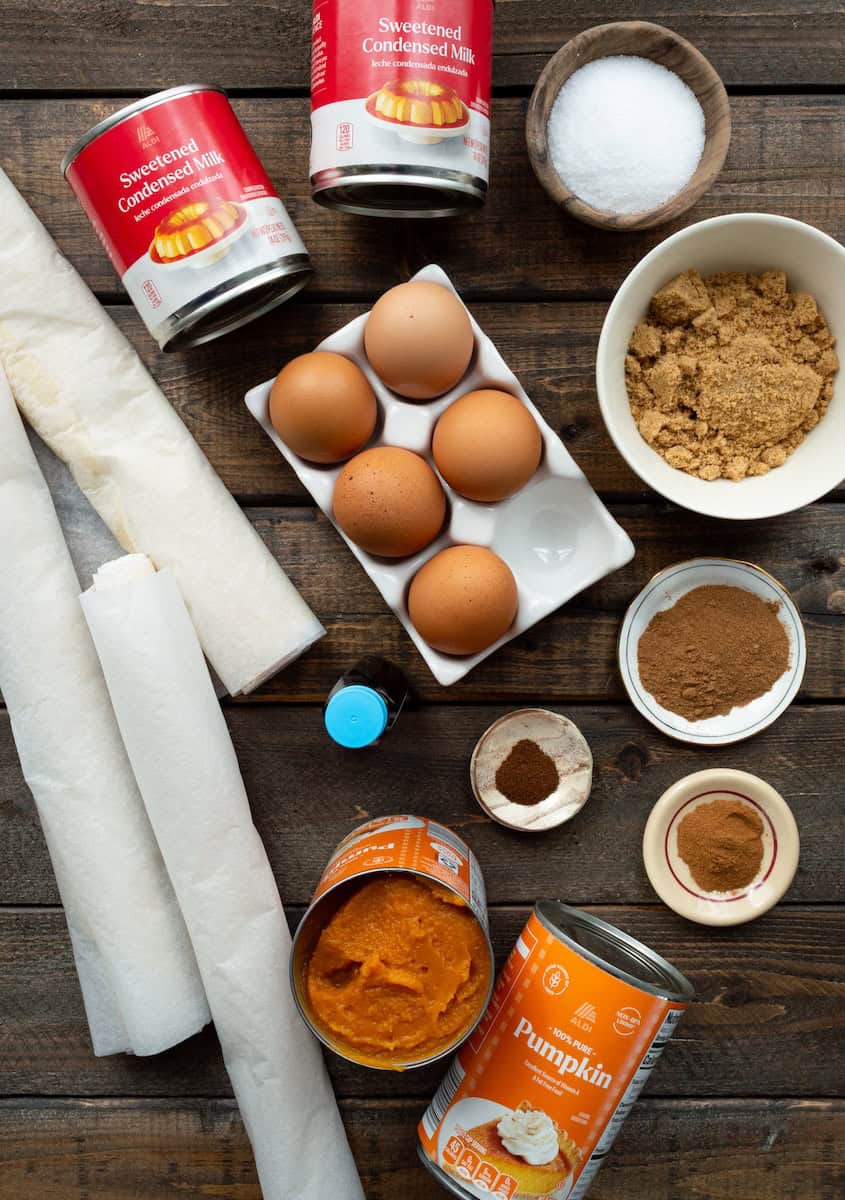
- refrigerated pie crusts or all-butter pie crust
- pumpkin puree
- sweetened condensed milk
- large eggs
- dark brown sugar
- vanilla extract
- pumpkin pie spice
- ground cinnamon
- ground cloves
- kosher salt
- egg wash (optional)
- whipped cream for serving (optional)
(See recipe card for quantities.)
Instructions
Now that we've got our ingredients, it's time to get baking!
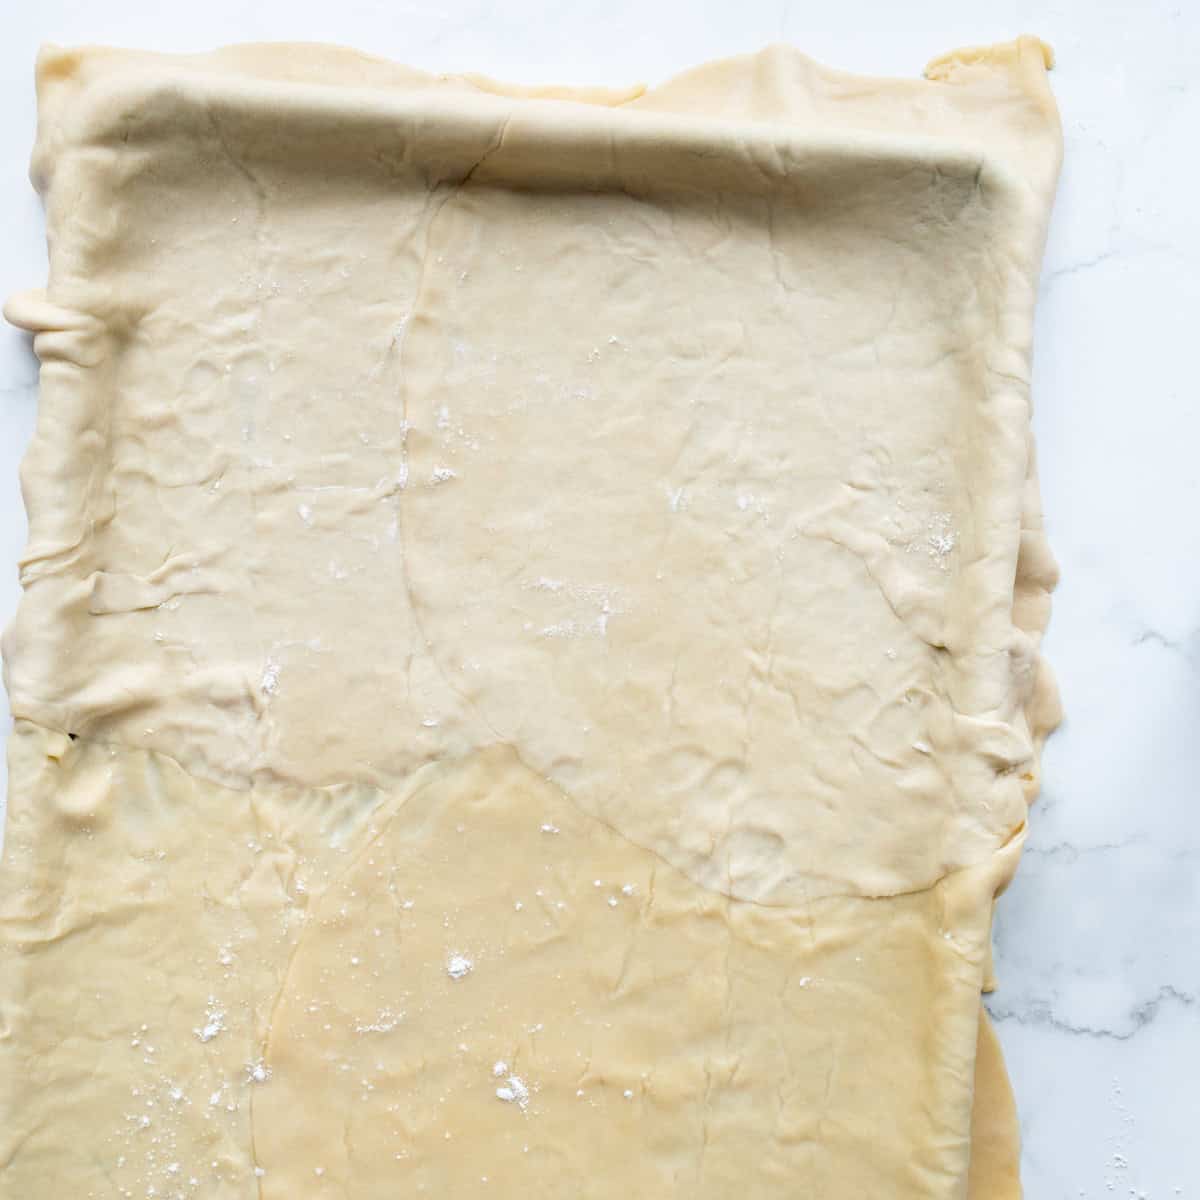
- First, roll the pie crusts to a 22- x 17-inch rectangle and fit into a greased rimmed baking sheet, letting about 1 inch hang over the sides.
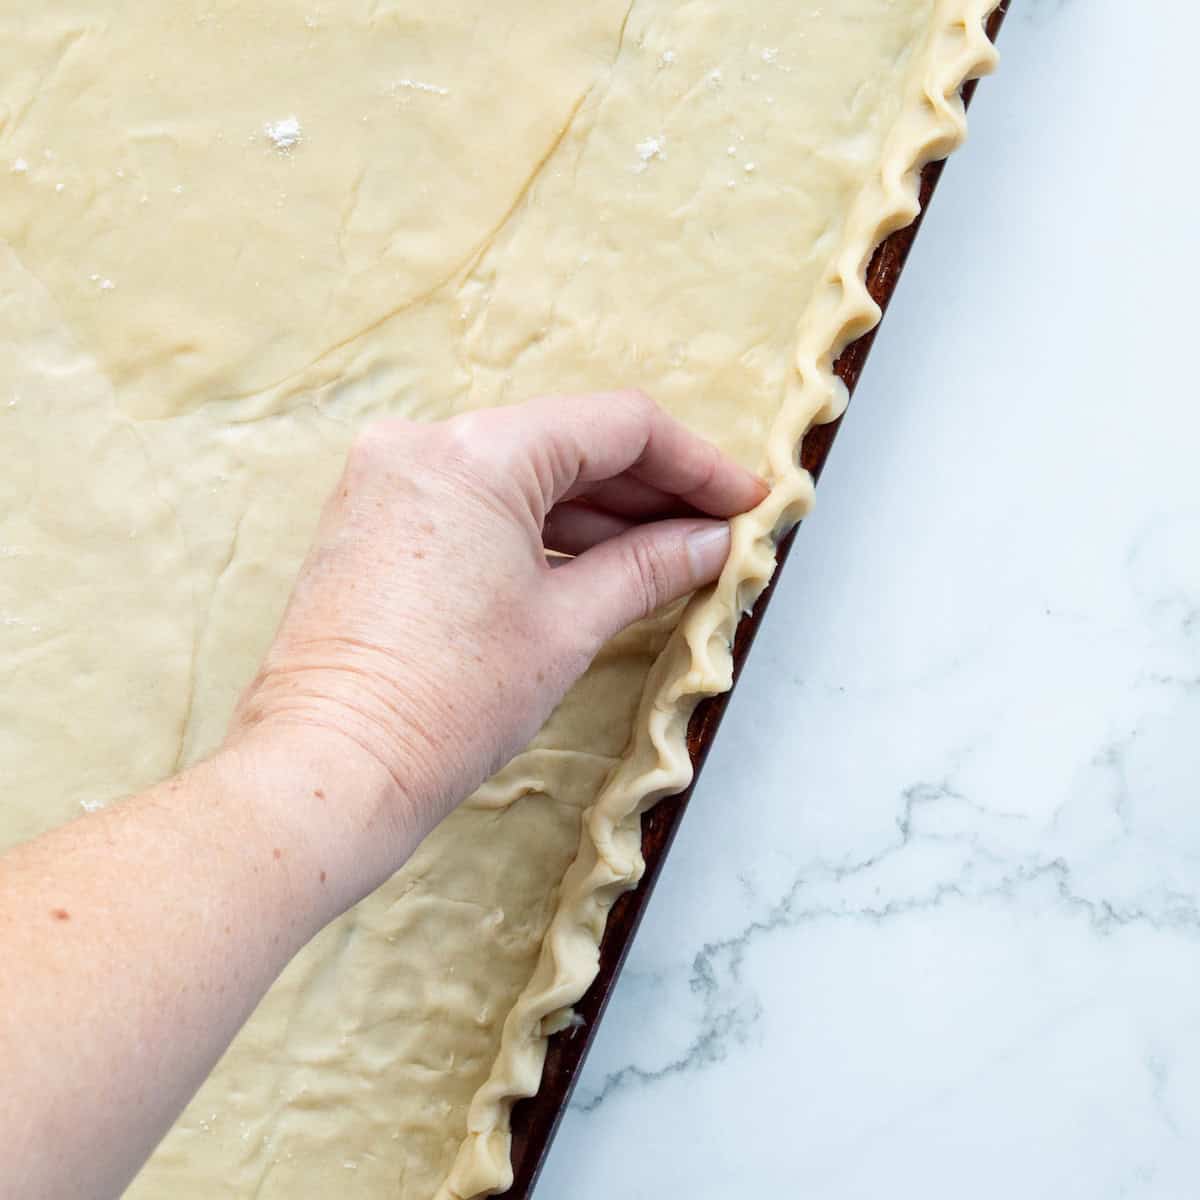
- Then, fold the edges under and crimp. Freeze for 30 minutes. Place a piece of parchment paper inside and fill with pie weights or beans. Bake at 425°F for 16 minutes or until lightly browned. Remove the weights and parchment paper and bake for 3 more minutes or until cooked through. Remove from the oven. Reduce the heat to 350°F.
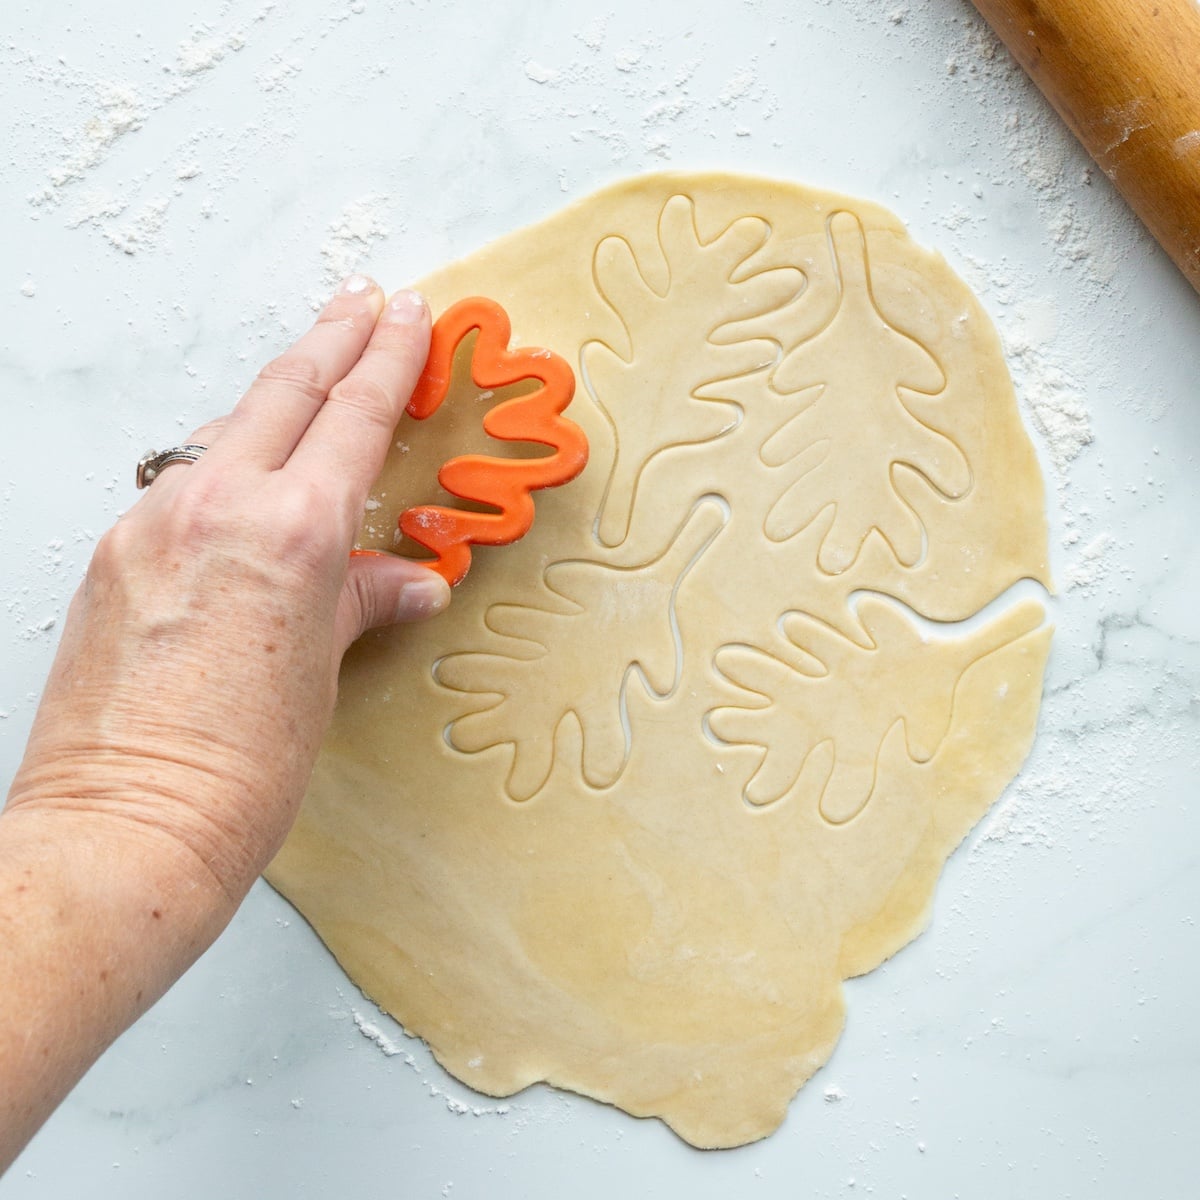
- Meanwhile, cut the pie dough scraps with a leaf-shaped cutter if desired. Use the back of a paring knife to create impressions in the leaves. Place in the refrigerator.
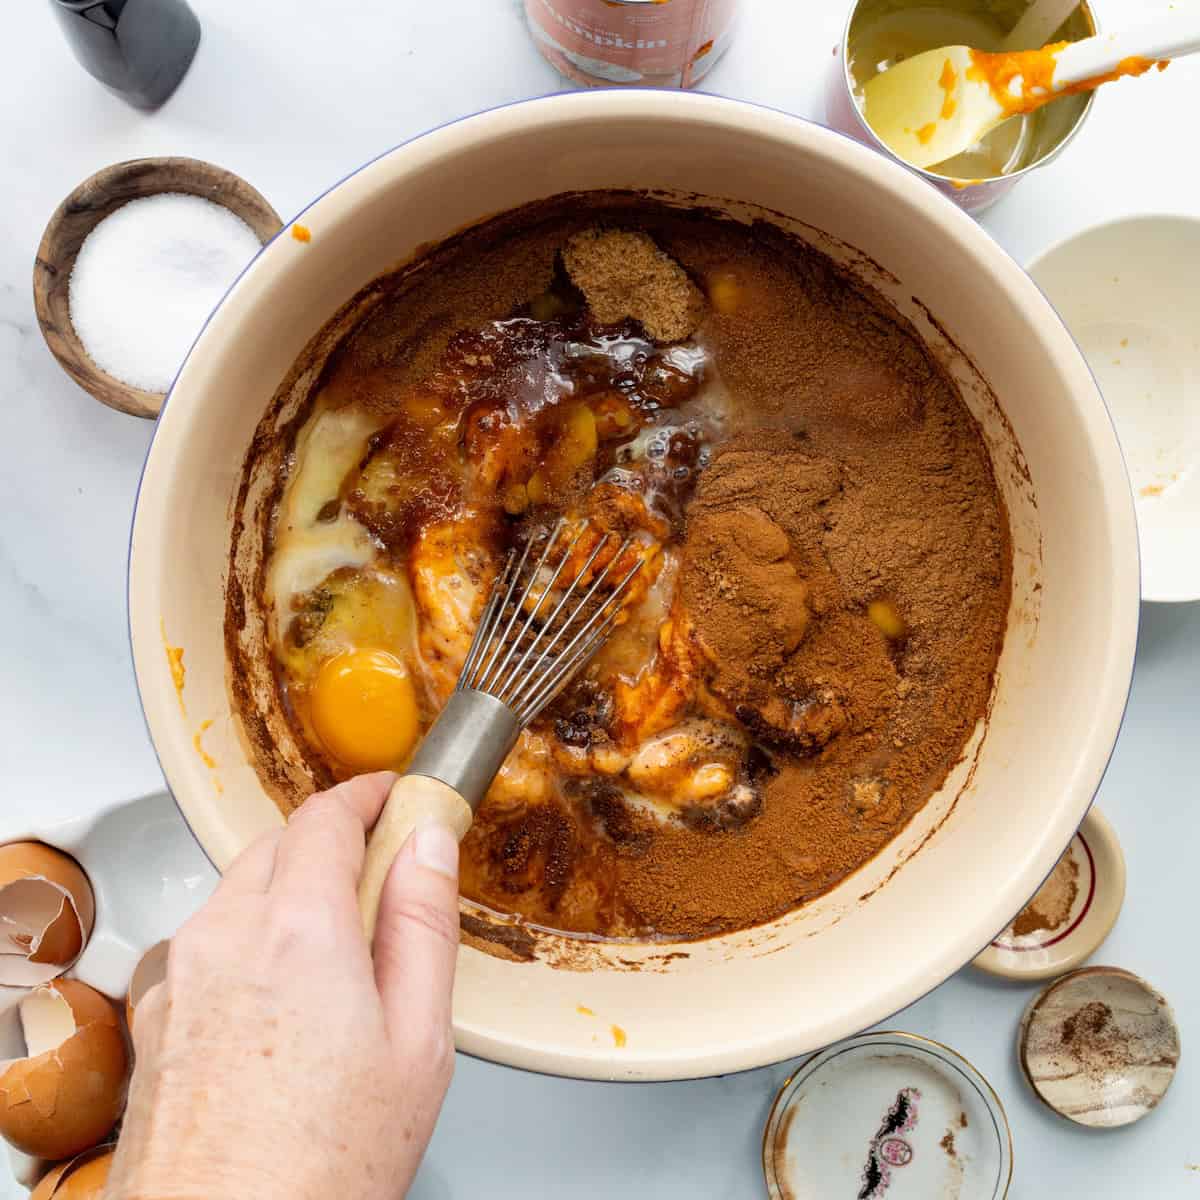
- Finally, whisk together the pumpkin puree, sweetened condensed milk, eggs, brown sugar, vanilla, pumpkin pie spice, cinnamon, cloves, and salt. Pour into the prepared crust. Brush the edges and the leaves with egg wash. Bake for 35 minutes or until set. Bake the leaves for 15 minutes or until browned. Remove from the oven and let cool completely. Cut into squares and garnish with the leaves. Serve with whipped cream.
Hint: For the best results, make sure the pie crust is super cold and don't stretch or overwork it. That'll cause the dough to shrink.
Hint #2: If you're using refrigerated pie crusts, be sure to seal any seams together well to prevent the filling from leaking. I attach the edges with a dab of water and schmear the dough together with my fingertips.
Substitutions
Need to make some ingredient swaps? Here are some ideas:
- Pie crust: Feel free to use refrigerated pie crust or another homemade crust as long as you have enough dough to cover the half sheet pan. As a general rule of thumb, this recipe requires about 4 regular pie crusts.
- Dark brown sugar: Light brown sugar works if that's what you have.
- Pumpkin pie spice: If you don't have pumpkin pie spice, you can make your own. Here's an easy homemade pumpkin spice recipe. Just remember the recipe already includes extra cinnamon and cloves, so keep those added amounts as written.
Variations
Check out these additional ways to change up this recipe:
- Skip the decorations: I like to make the leaf-shaped pie dough decorations not only because they're festive, but it also gives those folks who end up with a center piece more crust. But, you can leave off the leaf-shaped pieces for an even simpler finish if you'd like.
- Change the shapes: Use another small cookie cutter with the extra pie dough to make your own seasonal crust decorations.
- Change up the topping: Serve the pie as-is, with a spoonful of whipped cream, or with a scoop of vanilla ice cream just before serving.
- Add a little extra spice: A light dusting of cinnamon over the whipped cream is an easy way to dress up each slice without changing the filling.
Equipment
Here's the equipment you'll need to make this recipe:
- rimmed half sheet pan
- rolling pin
- large bowl
- whisk
- pie weights or dried beans
- parchment paper
- small mixing bowl
- pastry brush
- leaf-shaped cookie cutter (optional)
- dry measuring cup
- measuring spoons
Storage
To refrigerate: Once the whole pie has cooled completely, cover it tightly with plastic wrap or transfer individual pieces to an airtight container. Refrigerate for about 3 to 4 days.
For the cleanest slices, let the pie cool completely before cutting. Chilling it first can also make the squares easier to portion neatly.
To freeze: I'd be a little cautious with freezing because custard-style fillings can lose some of their smooth texture after thawing. If needed, wrap cooled slices well and thaw them overnight in the refrigerator before serving.
Tasty Tip
For the best results, don't skip the pre-baked pie crust step. Blind baking gives the crust a head start so it stays crisp and sturdy under the pumpkin filling instead of turning soft.
Frequently asked questions
Absolutely. Bake it, let it cool completely, then refrigerate it until you're ready to serve.
No. Use pure pumpkin or canned pumpkin puree, not pumpkin pie filling. Pie filling already contains added sugar and spices, so it would change the sweetness and flavor of the recipe.
Dickinson pumpkins are commonly used for commercially canned pumpkin puree because they have a smooth texture and mild flavor.
After about 35 minutes at 350°F, the filling should look mostly set with a slight jiggle in the center. Don't wait for it to look completely firm in the oven because it will continue setting as it cools.
Related
Looking for other recipes like this? Try these:


Pairing
These are my favorite dishes to serve with this creamy pumpkin pie:


🍽Get the recipe
Pumpkin Slab Pie (Costco Pumpkin Pie Copycat Recipe)
Equipment
- dry measuring cup
- measuring spoons
- rimmed half sheet pan
- Rolling Pin
- large bowl
- whisk
- pie weights
- small bowl
- pastry brush
- leaf-shaped cookie cutter (optional)
Ingredients
- 2 batches buttery flaky crusts (or use 2 boxes refrigerated pie crusts)
- 2 (15-ounce) cans pumpkin puree (not pumpkin pie filling)
- 2 (14-ounce) cans sweetened condensed milk
- 5 large eggs
- ½ cup firmly packed dark brown sugar
- 2 teaspoons pure vanilla extract
- 2 teaspoons pumpkin pie spice
- 1 teaspoon ground cinnamon
- ½ teaspoon ground cloves
- ½ teaspoon kosher salt
- 1 large egg yolk
- Sweetened whipped cream for serving
Instructions
- Roll the pie crusts into a 22- x 17-inch rectangle. (If using refrigerated pie crust rounds, pinch the edges under and use the scraps to make a rectangle.) Place in a greased rimmed half sheet pan. Fold the edges under and crimp. Freeze for 30 minutes.
- Preheat the oven to 425°F. Roll out the pie crust scraps and cut into leaf shapes, if desired. Refrigerate.
- Place a piece of parchment paper inside the pie dough and fill with pie weights or beans. Bake for 16 minutes or until the dough is almost cooked. Remove the pie weights and parchment paper and bake for another 3 minutes or until the crust is golden brown.
- Remove from the oven and reduce the oven temperature to 350°F.
- Whisk together the pumpkin puree, sweetened condensed milk, whole eggs, brown sugar, vanilla, pumpkin pie spice, cinnamon, cloves, and salt in a large bowl.
- Pour the filling into the crust and spread in an even layer.
- Whisk together the egg yolk and 1 teaspoon water in a small bowl. Brush on the edges of the pie and on the leaf cut-outs.
- Bake the pie for 35 minutes or until mostly set (the center will still jiggle). Bake the leaves for 15 to 18 minutes or until golden brown.
- Remove the pie from the oven and let cool completely before cutting into squares. Garnish with the leaves and top servings with whipped cream.
Would you like to save this?
Notes
Nutrition
Recipe guidelines and test kitchen tips
When developing and testing recipes, here are some key things that I do for more success in the kitchen:
- Be sure to use dry measuring cups for things like flour, sugar, and mayonnaise and a liquid measuring cup for things like water, milk, and broth.
- When measuring dry ingredients like flour and powdered sugar that can pack down, spoon the ingredient into a dry measuring cup and level with a knife as opposed to scooping the measuring cup into the ingredient.
- I test and develop recipes using a standard electric oven and standard gas stovetop. Be aware that if you use an electric stovetop or convection oven, your bake times will be different.
- When recipes call for kosher salt, I use Diamond Crystal kosher salt.
Food safety
Finally, don't forget to keep these food safety tips in mind when making this recipe.
- Do not use the same utensils on cooked food, that previously touched raw meat or eggs.
- Wash your hands after touching raw meat or eggs.
- Don't leave leftovers sitting out at room temperature for extended periods.
- Never leave cooking food unattended.
- Always have good ventilation when using a gas stove.



Leave a Reply